Brake Shoe: Service and Repair
CAUTION: GM replacement brake lining material, or equivalent is recommended for all vehicles to maintain the balance between front and rear brake performance. GM replacement brake parts have been carefully selected to provide the proper brake balance for the purposes of stopping distance and control over the full range of operating conditions. Installation of front or rear lining material with performance different from that of GM replacement parts recommended for this vehicle can change the intended brake balance of the vehicle.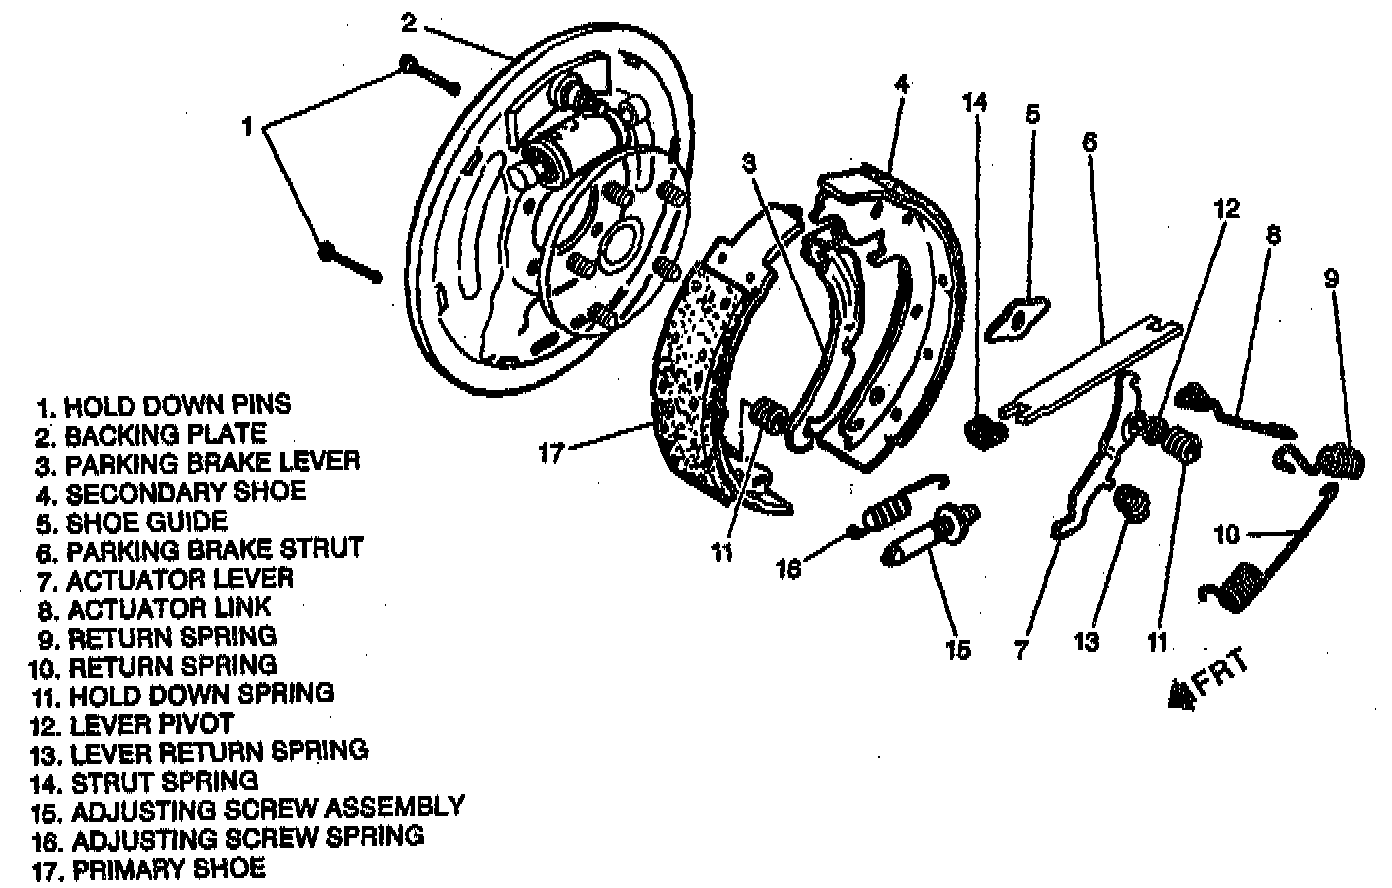
REMOVE OR DISCONNECT
1. Raise vehicle and support with safety stands.
2. Mark relationship of wheel to hub.
3. Tire and wheel.
4. Mark relationship of drum to axle.
5. Drum.
6. Return springs.
7. Shoe guide.
8. Hold down springs.
9. Hold down pins.
10. Actuator lever and lever pivot.
11. Lever return spring.
12. Actuator link.
13. Parking brake strut and strut spring.
14. Parking brake lever.
15. Shoes.
16. Adjusting screw assembly.
17. Adjusting screw spring.
NOTE: Inspect All parts for discoloration due to heat or stress. Replace as needed. All parts for signs of wear. Replace as needed. Wheel cylinder for signs of leakage.
INSTALL OR CONNECT
1. Lubricate shoe pads and adjusting screw threads with a thin coat of white lithium grease or equivalent.
2. Adjusting screw assembly and adjusting screw spring to both shoes. The coils of the adjusting screw spring must not touch the adjusting screw. Do not interchange right and left adjusting screws.
3. Shoe assembly to the backing plate.
4. Parking brake lever.
5. Strut spring onto the parking brake strut.
6. Parking brake strut.
7. Actuator lever and lever pivot.
8. Actuator link.
9. Lever return spring.
10. Hold down pins.
11. Hold down springs.
12. Shoe guide.
13. Return springs.
14. Drum. Align the marks made during disassembly.
15. Tire and wheel. Align the marks made during disassembly.
16. Adjust brakes.