Master Cylinder Replacement
Removing Master Cylinder Assembly:
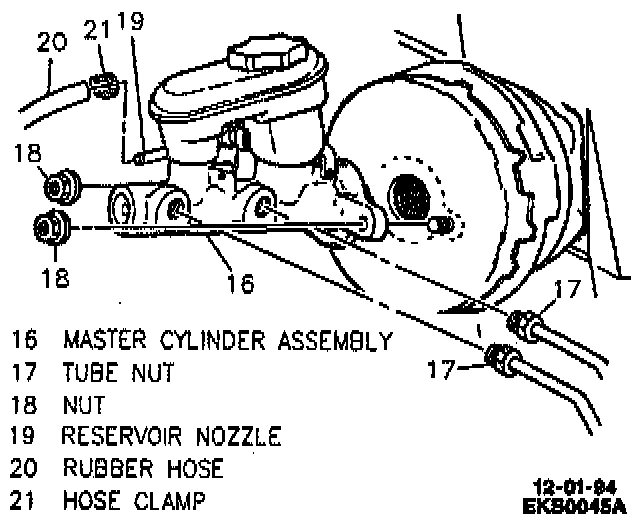
REMOVE OR DISCONNECT
1. Using a syringe, remove as much brake fluid as possible from the master cylinder reservoir before removing the reservoir.
NOTE: Dispose of brake fluid. DO NOT reuse. Reinstall reservoir cap along with diaphragm before proceeding.
2. Electrical connector from fluid level sensor switch.
3. Tube nuts and hydraulic lines. Plug open lines to prevent fluid loss and contamination.
4. Two attaching nuts.
5. Using a pair of clamp-type pliers, pinch off rubber hose as close to reservoir nozzle as possible to prevent fluid loss. Take care not to damage rubber hose or reservoir nozzle.
6. Move master cylinder forward off booster studs and lower flange end of master cylinder so that reservoir nozzle points up.
CAUTION: Use shop cloths to prevent any brake fluid that may leak from master cylinder or rubber hose from contacting vehicle body or electrical connections.
7. Hose clamp and rubber hose from reservoir nozzle.
8. Master cylinder.
INSTALL OR CONNECT
1. Master cylinder with attaching nuts. Tighten Master cylinder attaching nuts to 27 Nm (20 ft. lbs.).
2. Hydraulic lines and tube nuts. Tighten Brake pipe nuts to 15 Nm (11 ft. lbs.).
3. Rubber hose onto reservoir nozzle. Secure with hose clamp
4. Electrical connector to fluid level sensor switch.
Brake Fluid Level Indicator:
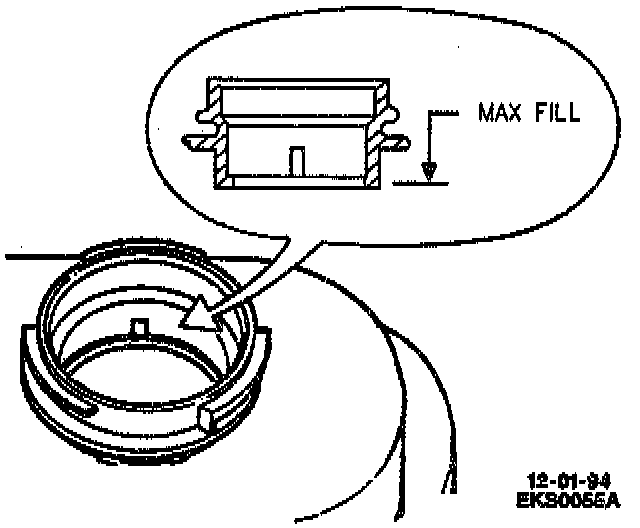
5. Fill master cylinder to proper level with clean brake fluid. Do not fill above maximum level indicator.
6. Bleed hydraulic system. Refer to Brake Bleeding. Service and Repair
7. Recheck fluid level.