Camshaft Removal/Installation
Camshaft Removal
1. Remove the camshaft bearing bolts.
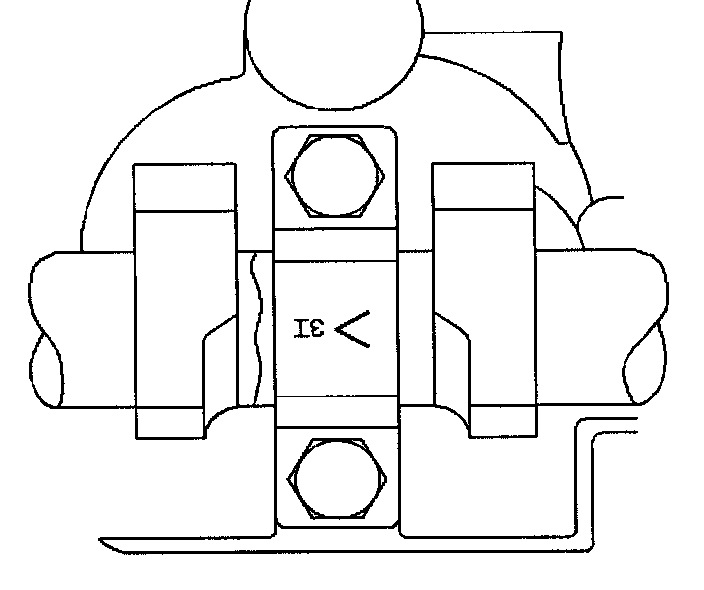
Important: Bearing caps must remain with their original cylinder head and in their original location, do not mix bearing caps.
2. Observe the markings on the bearing caps. Each bearing cap is marked in order to identify its location. The markings have the following meanings:
- The arrow points toward the front of the engine.
- The I indicates the intake camshaft.
- The E indicates the exhaust camshaft.
- The number indicates the journal position from the front of the engine.
3. Remove the camshaft bearing caps. Store the bearings in a clean shop towel.
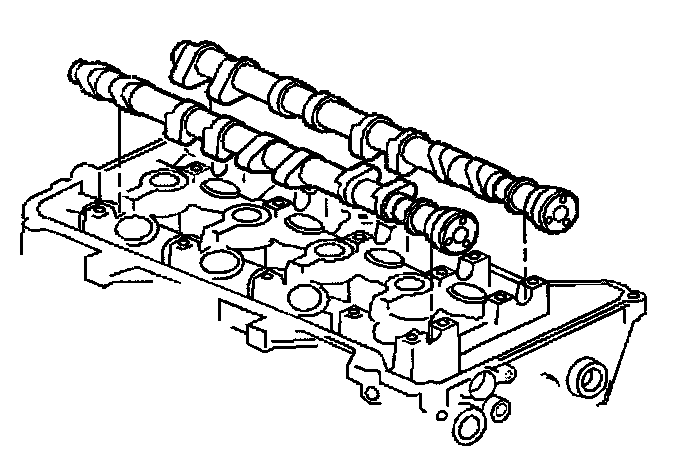
4. Remove the camshaft. Place the camshaft in a secure location.
5. Cover the camshaft with an oil soaked towel in order to prevent corrosion.
6. Repeat the procedure for each camshaft.
Camshaft Installation
1. Install the valve lifters with the flat surface facing up.
2. Clean the camshaft carriers with a clean, lint-free cloth.
3. Apply a liberal amount of clean engine oil to the carriers.
4. Place the camshaft in the camshaft carriers with the camshaft sprocket drive pins at the top of their rotation. The camshafts can be identified by a stamping near the rear journal. For example: L-EXH is defined as Left Bank Exhaust.
5. Install the camshaft bearing caps according to the identification marks. The arrow should point toward the front of the engine. The number indicates the position from the front of the engine and the I or E indicates intake or exhaust camshaft.
6. Hand start all the camshaft bearing cap bolts.
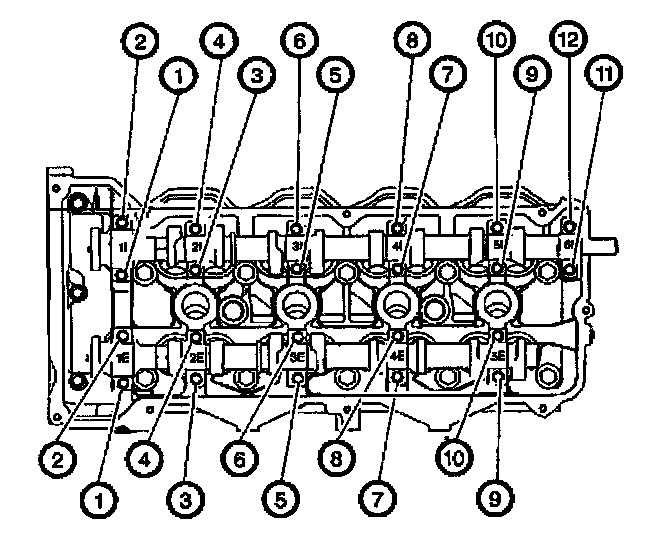
Notice: Use the correct fastener in the correct location. Replacement fasteners must be the correct part number for that application. Fasteners requiring replacement or fasteners requiring the use of thread locking compound or sealant are identified in the service procedure. Do not us paints, lubricants, or corrosion inhibitors on fasteners or fastener joint surfaces unless specified. These coatings affect fastener torque and joint clamping force and may damage the fastener. Use the correct tightening sequence and specifications when installing in order to avoid damage to parts and systems
7. Tighten the left cylinder head camshaft bearing caps.
Tighten
Tighten the camshaft bearing cap bolts in sequence shown to 5 N.m + 30 degrees (44 lb in + 30 degrees).
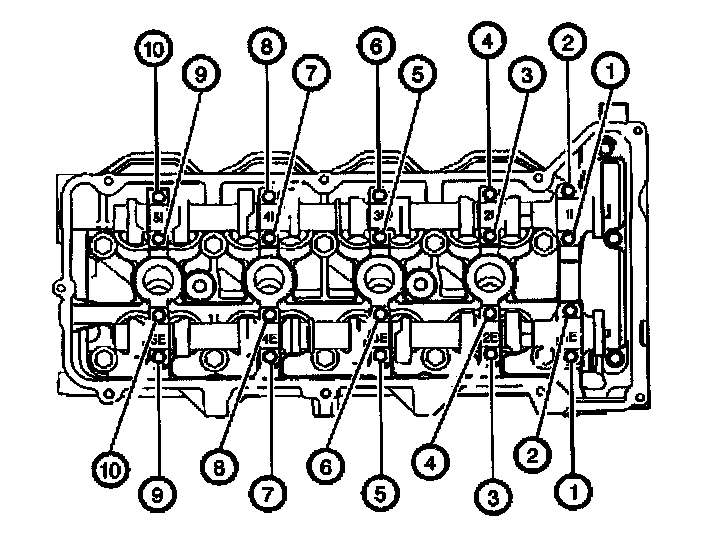
8. Tighten the right cylinder head camshaft bearing caps.
Tighten
Tighten the camshaft bearing cap bolts in sequence shown to 5 N.m + 30 degrees (44 lb in + 30 degrees).