Toe Link
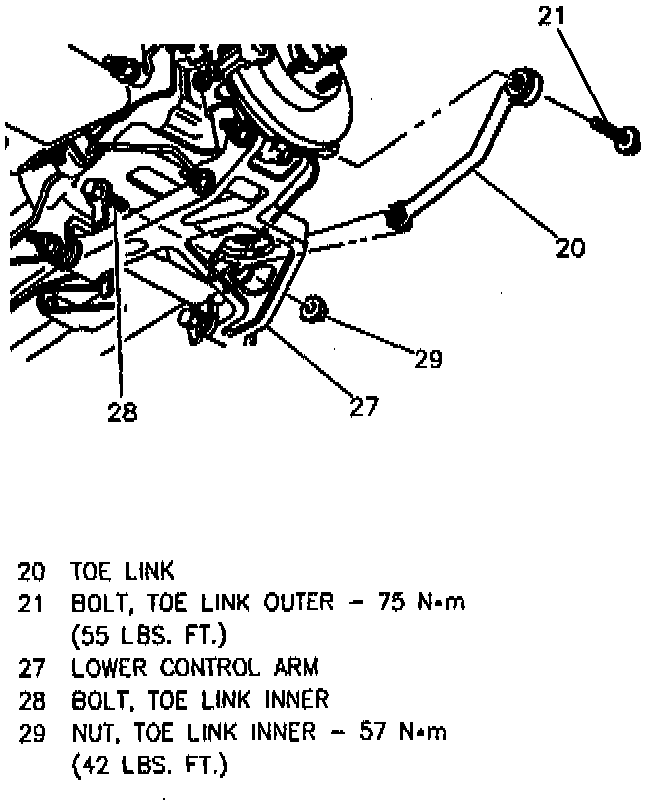
REMOVE OR DISCONNECT
1. Raise vehicle.
2. Wheel and tire.
3. Toe link bolt from knuckle and discard. Bolt is not reusable.
4. Toe link to suspension support bolt and nut.
INSTALL OR CONNECT
1. Toe link to suspension support bolt and nut. Do not tighten at this time.
2. New toe link outer bolt. Do not tighten at this time.
3. Support outboard end of lower control arm with screw jack to bring suspension to design position. Toe link must be tightened in design position to reduce wind up in bushings.
^ Tighten:
- Outer toe link bolt to 75 Nm (55 ft. lbs.).
- Inner toe link nut to 57 Nm (42 ft. lbs.).
4. Wheel and tire.
^ Tighten the wheel nuts to 140 Nm (100 ft. lbs.).
5. Lower vehicle.
Important: A rear wheel alignment must be performed after removal and installation of toe link. Refer to WHEEL ALIGNMENT for procedure.