Outer C/V Joint and Seal Assembly
^ Tools Required:- J 8059 Snap Ring Pliers
- J 35910 Seal Clamp Tool
- J 41048 Swage Tool
DISASSEMBLE
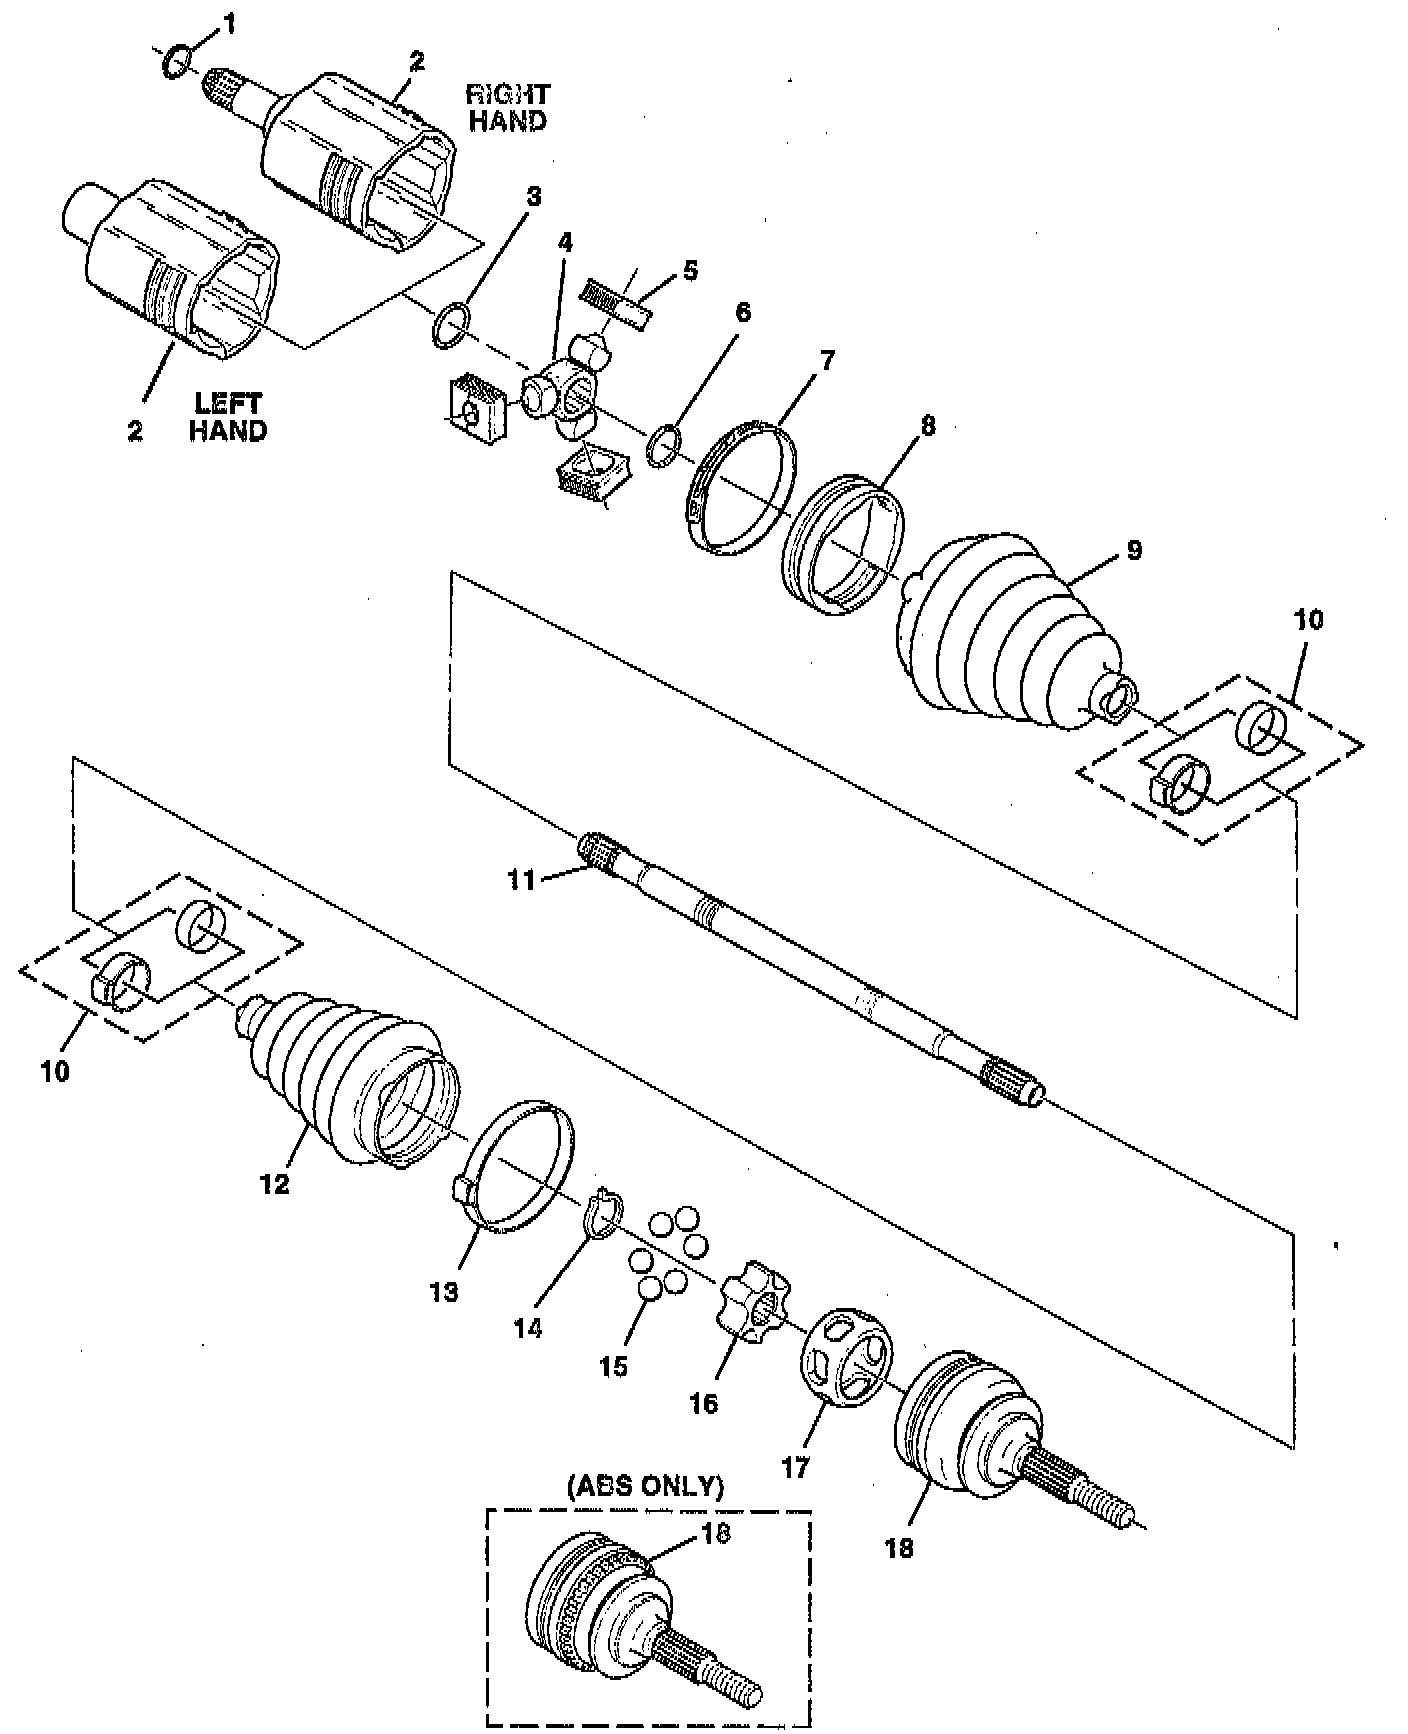
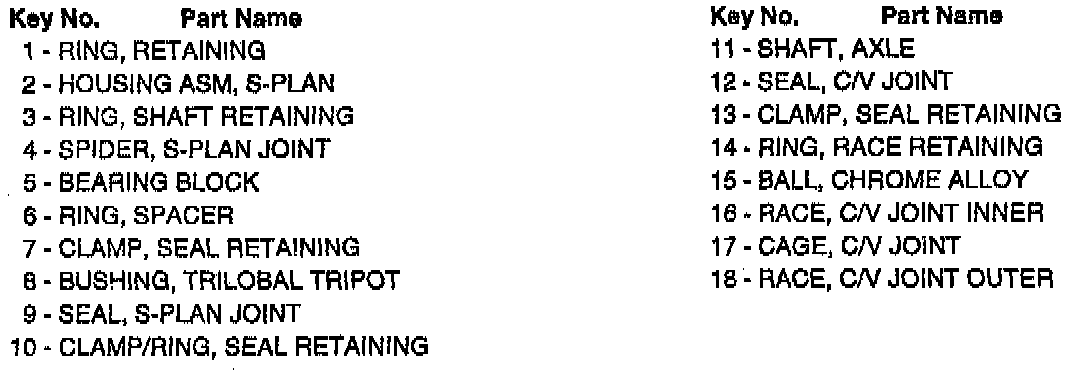
1. Large seal retaining clamp (13) from C/V joint with side cutter and discard.
2. Small seal-retaining clamp (10) on axle shaft with side cutter and discard.
3. For swage ring removal, use a hand grinder to cut through the ring (taking care not to damage the axle shaft).
4. Separate joint seal (12) from C/V joint race (18) at large diameter and slide seal away from joint along axle shaft (11).
5. Wipe grease from face of C/V inner race (16).
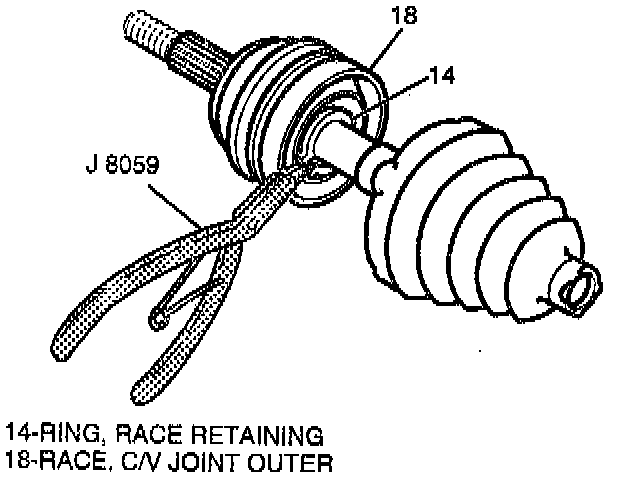
6. Spread ears on race retaining ring (14) with J 8Q59 as shown and remove C/V joint assembly from axle shaft (11).
7. Seal (12) from axle shaft (11).
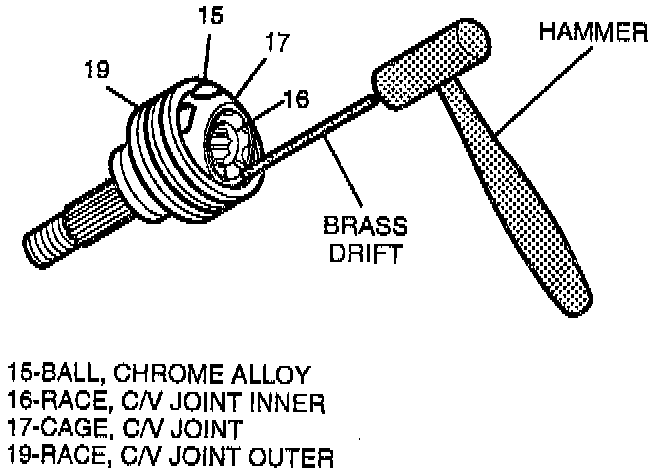
8. Use a brass drift and a hammer to gently tap on C/V joint cage (17) until it is tilted enough to remove first chrome ball (15).
9. Tilt cage (17) in opposite direction to remove opposing ball (15).
10. Repeat this process until all six balls (15) are removed.
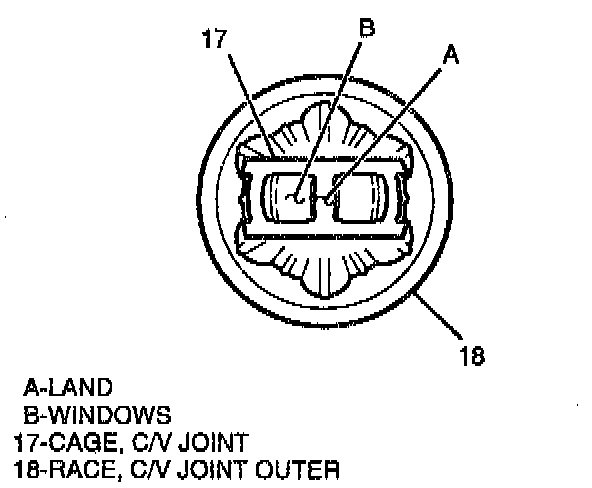
11. Position cage (17) and inner race (16) 90° to centerline of outer race (18) and align cage windows with lands of outer race.
12. Cage (17) and inner race (16) from outer race (18).
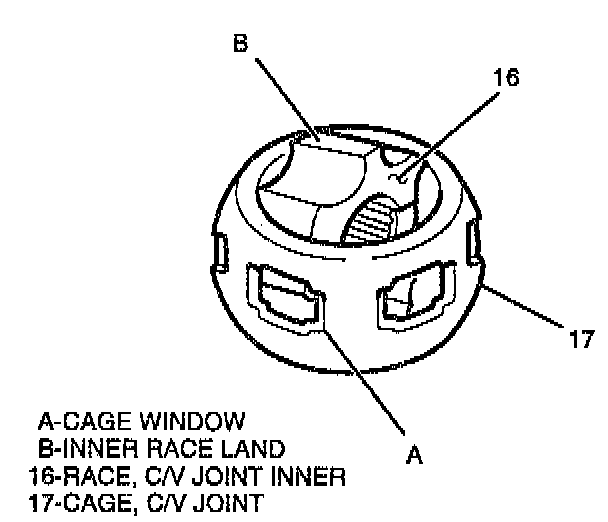
13. Rotate inner race (16) 90° to centerline of cage (17) with lands of inner race aligned with windows of cage.
14. Pivot inner race (16) into cage (17) window and remove inner race.
Clean
^ Inner and outer race assemblies, cage and balls thoroughly with clean solvent. All traces of old grease and any contaminants must be removed. Dry all parts.
ASSEMBLE
1. New swage ring (10) on neck of new seal (12). Do riot swage.
2. Slide seal (12) onto axle shaft (11) and position neck of seal in seal groove on axle shaft (11).
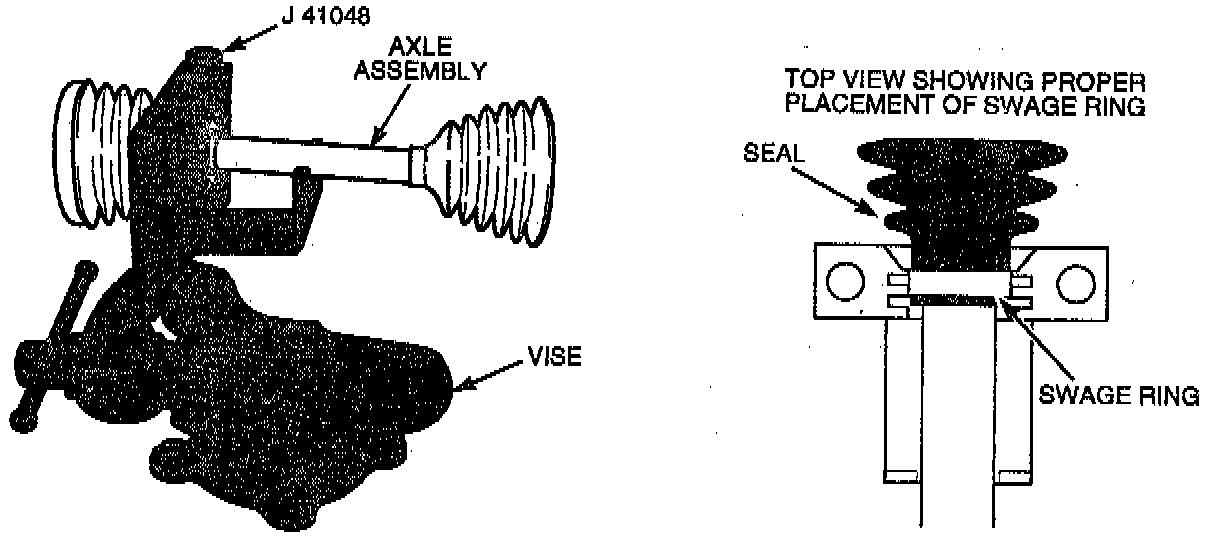
3. The swage ring is swayed using J 41048 by the following method:
- Position outboard end of halfshaft assembly in tool.
- Align the swage ring as shown in the figure.
- Place top half of tool on lower half of tool.
- Make sure there are no pinch points on the seal before proceeding. This could cause damage to the seal.
- Insert bolts and tighten by hand until snug.
Important:
^ Make sure that seal, housing and swage ring all remain in alignment.
^ Tighten each bolt 180° at a time, using a ratchet wrench. Alternate between each bolt until both sides are bottomed.
^ Loosen bolts and separate the dies.
^ Check swayed ring for any "lip" deformities. If present, place the ring back into the tool making sure the ring covers the whole swaying area. Then re-swage the ring.
4. Put a light coat of grease on ball grooves of inner race (16) and outer race (18).
5. Hold inner race (16) 90� to centerline of cage (17) with lands of inner race aligned with windows of cage and insert inner race into cage.
6. Hold cage (17) and inner race (16) 90° to centerline of outer race (18) and align cage windows with lands of outer race.
7. Cage (17) and inner race (16) into outer race (18).
Important: Be sure that retaining ring side of inner race (16) faces axle shaft (11).
8. Insert first chrome ball (15) then tilt cage (17) in opposite direction to insert opposing ball.
9. Repeat this process until all six balls (15) are in place.
10. Place approximately half of grease provided inside seal (12) and pack C/V joint assembly with remaining grease.
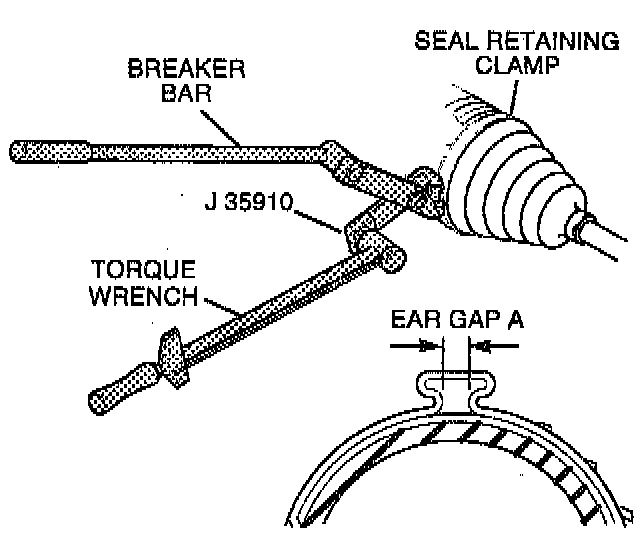
11. Push C/V joint onto axle shaft (11) until retaining ring (14) is seated in groove on axle shaft.
12. Slide large diameter of seal (12) with large seal retaining clamp (13) in place over outside of C/V joint race (18) and locate seal lip in groove on race.
Important: Seal (12) must not be dimpled, stretched or out of shape in any way. If seal is not shaped correctly, equalize pressure in seal and shape seal properly by hand.
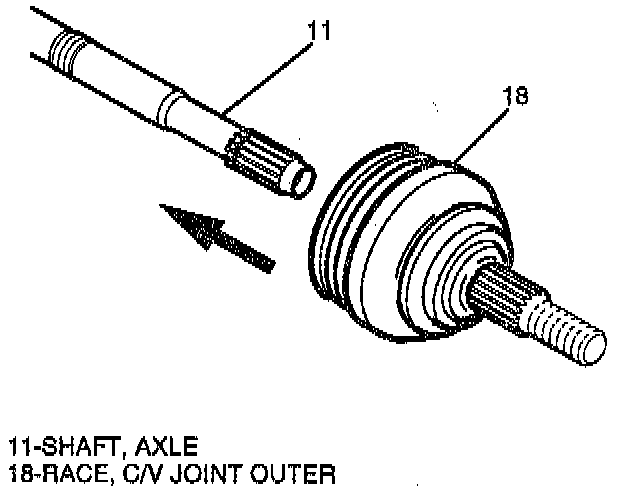
13. Crimp seal retaining clamp (13) with J 35910 to 176 Nm (130 lb ft).
14. Check the crimp profile for correct shape and ear gap.